Modern Alice In Wonderland Fancy Drinks Your Friends Will Love

Good day and good eating to you,

Once again it is I, Chef Rouxby the royal chef de cuisine at the Heart Castle and here as your most competent guide to imaginative kitchens of Wonderland. Having survived being a chef to the Heart Queens for many reigns, it seems only sensible to share these delightful recipes while they are still in my head.

As the Earth nears the celebration of another year of whimsy & madness, I am told it is quite common to provide your guests with drinks and merriment to welcome the new year. So, collect your crystal goblets and take care to not spill as we enter the madcap world of mixology!
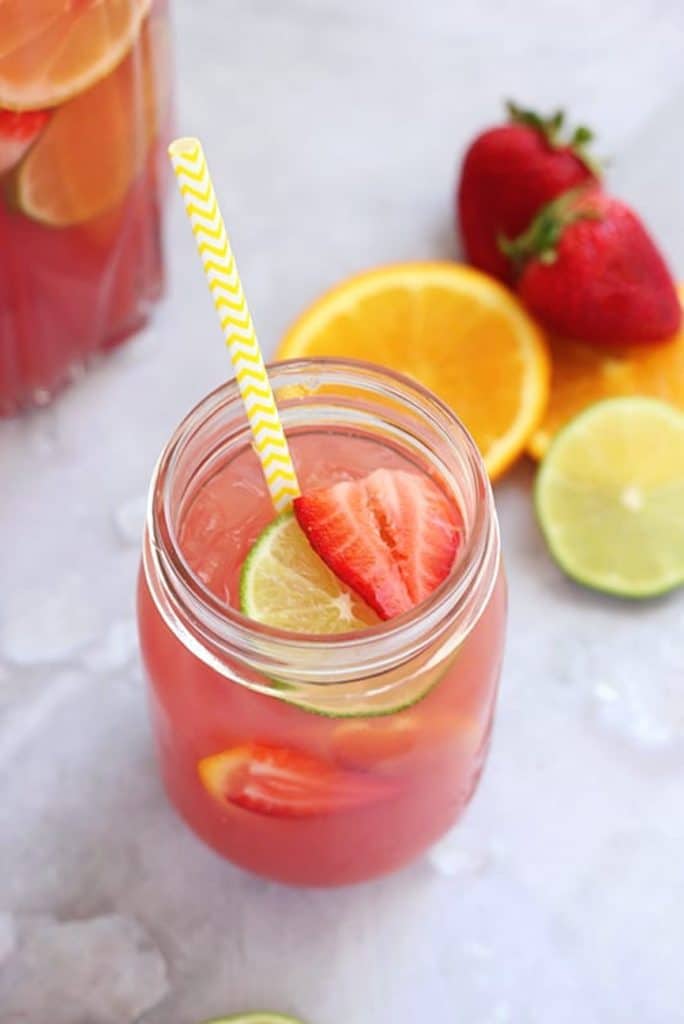

Wingelfruit Punch

Let us start with the favorite drink of Princess of Wonderland Alyss Heart herself, and one I delightfully served at her birthday parties… until, well you know. There are few beverages as appropriate for a party as punch, one which can be served to all guests without risking the merriment between your houses. Using a base of pleasantly tart wingelfruit juice, or this “cran berry” of the Earth realm, you can create a balanced yet sweet beverage that can pair with any of the savory treats you might have crafted for the occasion.

Ideally you will be able to find all the available fruits & their juices without any added sugars or similar alchemist sweeteners; nature is sweet enough, my dearies. Should you wish to further impress your guests, I would recommend bringing out your lord or lady’s finest crystal goblets to let the fruit truly shine in the eyes before the palate.

However, if your guests are rowdier then perhaps some paper cups embellished with the symbols of Wondertropolis’ great houses are in order (believe me, it will save your Walrus Butler hours of sweeping broken glass).

Wingelfruit Punch

INGREDIENTS:

We start simply by mixing your variety of fruit juices in a large serving pitcher or similar container and set aside in your “refrigerating box” until you are ready to begin the drink service.

In the lull between exciting party games (or clean-ups), now is the time to slice your fruit for garnishing your guests’ beverages. I would recommend using the same kind of fruit as the juices you have procured for this punch.

Now that your guests are arriving, and you are ready to begin drink service; add your sliced fruit to the cup but do not over-crowd as this is a beverage not a fruit salad and add ice if requested.

Then add the ale of ginger last, while not alcoholic like a standard ale I’m told, it is from a fabulously fizzy style of drink on Earth called “soda pop.”

Add this delightfully bubbly ingredient to your punch last, poured slowly as to avoid the loss of such “action” in your guests’ glasses.

Serve and enjoy cold.

Mulled “Flugelberry” Wine

Any reputable chef or cook in Wonderland would be wise to keep their kitchen stocked with good flugelberry wine for cooking & drinking. That said, not every bottle will impress a Diamond much less a Heart Queen, so to entice the tastes of your guests one can “improve” their wine with the spices & fruits that warm up your cup with a taste of the seasons.

While you mull over which glassware to use, be aware that this recipe is quite versatile depending on your available wines, spices, and fruit so there is very little you can do “wrong” here. This is a delicate process though, so be careful to keep that fire under control and allow the cinnamon-minnamon to bring the heat.

Mulled Flugelberry Wine

INGREDIENTS:

Combine your ingredients. Add your wine, brandy, orange slices, cloves, cinnamon, anise, and sugar (or honey) and stir briefly in a large saucepan.

If you cannot source whole spices depending on the location and season of your realm, then using a spiced tea like chai is a good substitute. If you plan on a late evening beverage, then perhaps acquire a decaffeinated blend of tea.

Simmer your ingredients on medium-low heat, being careful to keep the wine from bubbling. Steam is quite fine, but bubbles mean trouble. Reduce the heat and cover with a lid, allowing to continue simmering for at least 15 minutes, and up to 3 hours before it becomes too bitter.

Then using a fine mesh strainer, remove the orange slices and whole spices from your mulled wine. Give it a taste for sweetness, and add more to your or your guests’ liking.

Now that your mulled flugelberry wine is ready, serve it up in heatproof mugs and topped with garnishes of your choosing.
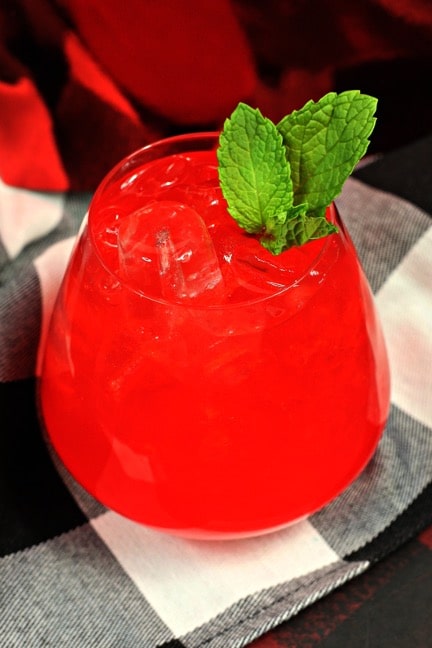
Queen Of Hearts

Once the festivities as slowed and crowds gone, a more elegant cocktail is called for when entertaining a smaller, more intimate group of guests. To my pleasant surprise there was already a beverage known in on Earth that seems too delicious to not mix up for a few close confidants, or to serve the guests of a royal coronation.

The sophistication of cocktail comes from the selected ratios of ingredients to create the exacting flavor you are looking for; but taste is individual and there are many imaginative additions and replacements one might indulge, this is the version we in Wonderland wish to impart to you.

Be warned—if you are asked which Heart Queen this drink pays homage to, answer carefully and do take into account the temperament of your royal patron. While a White Queen may not see herself in this drink, a Redd Queen with a black heart can easily be persuaded to believe she inspired this vibrant drinking experience.

The Queen of Hearts Drink
The Queen of Hearts

INGREDIENTS:

If you do not have a favored flavored vodka, then in a clean jar you may roughly smash some of your preferred berries (the Earth “cherry” or “blackberry are excellent choices). Add your desired amount of alcohol, seal well, and give a good shake, leaving your potion to steep for 30 minutes but preferably overnight.

While a pitcher might do for a large gathering of guests, for the smaller serving size of cocktails amongst your comrades one should prepare a cocktail shaker with ice or by leaving in the freezing box until very cold. If you do not possess such technology, two large metal cups can be used but beware of spilling your bright red beverage.

In your chilled cocktail shaker: add your wingelfruit juice, orange juice, berry vodka (strained if you have concocted your own), and squigberry liquor, or Campari in the recommended ratios. Seal your shaker and stir well, or shake if you wish to impress your guests as there is no ice at this point which can be melted and watered down.

In your rocks glass, or whichever cocktail glass or goblet suits your fancy, add crushed iced and let sit until the glass begins to feel chill. Depending on the warmth of your bar top, some of the ice may have sweat and added extra water to your cup so feel free to carefully pour it out before pouring your Queen of Hearts cocktails.

Pour your brilliantly red beverage over the crushed ice. Then squeeze a small wedge of lemon into the glass and briefly stir to mix, you may add the wedge as garnish along with any berries you might have left over from your previous cocktail adventures.

Serve immediately and enjoy!


Final Thoughts

Imagine that! We’ve made it through another dinner. Well done, my dears. If you have yet to pour yourself a drink during all this well that’s certainly one more lesson Chef Rouxby can pass on to you. Each of these fine libations can be brewed on moment’s notice and are sure to delight guests of any suit.

So, from the kitchens of Heart Castle to the hearths of your own home, I hope these inspired beverages find you in good spirits or at least help to raise them this season.

For More Wonderland Recipes Check Out:

The Royal Recipes of Wonderland: Baking Recipes You Won’t Believe

The Royal Recipes of Wonderland: Sweet Treat Edition


Meet The Author

Marco Arizpe

Marco Arizpe graduated from the University of Southern California and The American Film Institute with degrees in filmmaking and screenwriting. His brand of borderland gothic horror stems from his experiences growing up in a small town where Texas and Mexico meet. Culturally steeped in a rich history of all things terrifying, Marco never fails to bring forward indigenous folklore in contemporary and fresh settings.

The Royal Recipes of Wonderland: Baking Recipes You Won’t Believe

Good day and good eating to you dear reader,

It is I, Chef Rouxby the royal chef de cuisine at the Heart Castle and your most competent author of this fine bit of cookery know-how. Having survived being a chef to the Heart Queens for many seasons, I wish to pass on my knowledge to all who wish to enchant their tastebuds with the finest food ever Imagined.

I have been informed that this time of year on Earth is when the peoples of your realm gather to feast and make merry, how delightful. Seeing how a multi-course feast might be out of reach for a chef outside the various royal estates in Wondertropolis, I have set out an ideal appetizer, entree, and classic desert to delight any taster you entertain this Thanksgiving or holiday season.


A SAVORY STARTER OF FRIED DORMICE

The first course, or “appetizer,” is a first impression to the rest of your seasonal feasts. Far and wide, from the fine streets of Wondertropolis to the rough-n-tumble Boarderlands, there are few beasties that fry up as well as dormice. Now those without proper instruction may just fry the dormice whole and season simply, but for feastivi-teas we should be inclined to bring our best.

For the classy guests of Heart Castle, and those you invite into your own homes this season, one should not have to deal with such small bones & burnt whiskers. So, this recipe shall take pre-ground dormice, or the local hen or hog of your homestead, to make a delightfully fried croquette that will indulge your guests’ desire for crispy goodness.

INGREDIENT LIST

The Filling

The Breading

Crispy Croquettes of Dormouse

STEP-BY-STEP INSTRUCTION

  1. Begin by boiling your potatoes and coarsely smash them, no need to be dainty about it, and set them aside to cool while you prepare the other ingredients you may need to the rest of your feast.
  2. Set a shallow pan over medium heat on your stove top. While that comes to heat, take your small onion, and dice it finely.
  3. In the hot pan, add your olive oil then allow to cover your pan’s surface and begin to “shimmer” like a mirror. Once suitably hot you may add your diced onions and stir regularly until the onions are translucent, you may add oil or butter if the pan begins to dry out.
  4. After your pre-cooked ingredients have cooled, in a large bowl mix the mashed potatoes, ground dormice, diced onion, and seasonings. If you have the palate for it, some ground  nut-of-meg and dry herbs like rosemary are popular in Earth realm cookery.
  5. Thoroughly mix your ingredients, but do not over mix as the texture will become tough. The final croquette filling should be workable into small “dumpling” sized shapes for frying but not too sticky to the touch. Shape your dormouse filling into small ovals not to dissimilar from a dormouse’s natural shape and set aside in your fridge-box until you are ready to fry.
  6. Now is the time to prepare your breading station. Clean hands make quick work, so do avoid breading yourself by keeping one hand focused on dry ingredients and the other on your wet ingredients. In separate bowls; stage your flour, breadcrumbs, and eggs (which have been whisked with a tiny splash of water), as well as a cookie sheet or similar to place your breaded dormice.
  7. First dust your dormice croquettes in flour, then egg wash, and finally into your breadcrumbs. Repeat the process until you’ve used up all your ground dormice mixture and prepare to fry.
  8. In a suitable heavy-bottomed pot or deep pan, fill the vessel halfway with the frying oil of your choice and allow to come up to a frying temperature. You can test for this with a wooden skewer or “chop stick” which will have bubbles form up around the tip when submerged in the hot oil. Now you are ready to fry these delightful dormice, dear reader!
  9. Carefully place a few “dormice” at a time in the oil with tongs or a similar utensil, flipping after 4 to 5 min, or until golden brown on all sides. It is best to have a plate lined with paper towels to place the freshly fried treats to dry out and be lightly salted immediately while hot.
  10. After the fried dormice have cooled enough to touch, roughly six or seven minutes, you can pierce the “bottom end” of your croquettes with toothpicks for ease-of-handling and to mimic the tails of the little morsels. Additionally, should you have the time & patience, an ambitious home cook may place sesame seeds to add eyes and a nose, completing the illusion!
Dormouse Decorated Croquette

AN ENTICING ENTREE OF ROAST TUTTLE-BIRD

Once all have settled around your table and the appetite is primed for the main course, you may stun your guests with an elegantly roast of tuttle-bird. In the lower parts of our fine community, a simple leg of tuttle-bird is common fair, but for this feastivi-tea we shall endeavor to prepare an entire roast. While this may seem a daunting task to you dear reader, rest assured that I shall guide you through this dish.

INGREDIENT LIST

The Tuttle-Bird

Tuttle-Bird Ready to Roast

STEP-BY-STEP INSTRUCTION

  1. Before getting started remember to preheat your oven to 450 F (232 C)
  2. Firstly, slice your lemon in half & deseed. Then slice your head of garlic in half along the middle, keeping the bulb together in two halves (top & bottom).
  3. In a saucepan, microwave, or heating-crystal array, melt your butter.
  4. On a cutting board (avoid wood as it is absorbent), pat your tuttle-bird dry to ensure the best crisping of the skin.
  5. With the breast facing up and legs pointing toward you, use a sharp knife to slice through loose area of skin connecting the leg and breast. Continue cutting downward until you hit the joint that connects the thigh to the body, then stop (once through the skin, there’s not much there; if you are cutting through flesh, you’re too close to the breast). This exposes the leg joint, making it easy to tell if your roast is cooked. Repeat on second side.
  6. Season every inch of your tuttle-bird, on the inside and out, under the wings and along the backbone. Do not be shy, the tuttle-bird sure isn’t.
  7. Place your tuttle-bird in a large, oven-safe skillet or sufficiently sized baking pan lined with aluminum foil. Arrange your lemon and garlic around the tuttle-bird.
  8. Pour that golden elixir called melted butter all over the bird and move it into the oven.
  9. Roast until the meat is nicely browned and cooked through, checking for doneness after 45 minutes. To check, carefully remove skillet from oven (the handle is hotter than the fury of Queen Redd—use caution!), poke a knife into leg joints, and pierce the meat.
  10. If juices run clear, the bird is done. If you see a rosy, pink color, it needs more time. Continue to roast, checking every 5 minutes, until juices run clear.
  11. Let the tuttle-bird rest in the skillet for 15 minutes before carving, this is the minimum weight time to avoid a bird so dry it will make you cry.
  12. Once properly rested, you may carve this roasted tuttle-bird for your esteemed guests and enjoy alongside the various fresh sides local to your realm.
Delicious Roast Tuttle-Bird

A FRUITY FINALE OF TARTY TARTS

If there was ever a sweet treat more popular in Wonderland then I’ve certainly never heard of it; from afternoon tea to a Caterpillar’s bribe, there is no finer a pastry to be had at any time or place. For those of you in the know, there are as many tarty tarts as there are tasters with tastes all their own and what we have here is merely one variation of this fine foodstuff.

While variety is the cinnamon-minnamon of life, for the unrefined home cook (unlike myself), this basic tarty tart shall be your looking glass into a whole Wonderland of pastry. By changing your berries with the season, or temper of your guests, this classic & simple tarty tart can elevate your tea parties and keep your head on its’ shoulders.

INGREDIENT LIST

The Crust

The Filling

Tart with Strawberries and Mint

STEP-BY-STEP INSTRUCTION

  1. Whisk sugar, salt, and 1 cup flour in a medium bowl.
  2. Add butter and rub in with your fingers until mixture resembles coarse meal with a few pea-size pieces remaining.
  3. Drizzle egg over butter mixture and mix gently with a fork until dough just comes together.
  4. Turn out dough onto a lightly floured surface and knead until smooth (a few dry spots are okay). Form dough into a disk. Wrap in plastic and chill until firm, at least 2 hours.
  5. While your dough is resting dear readers, we shall be doing the opposite! In another bowl, gently mix your ricotta, eggs, and honey until you achieve an even mixture. Then add the vanilla, lemon zest, and salt, mixing for a final time.
  6. When you are ready to assemble your tarty tart, do remember to preheat your oven to 350 F (176 C) and flour a clean surface to roll out your tart dough.
  7. Roll out your dough with a well-floured rolling pin, if the dough cracks along its edges let it rest at room temp before attempting again.
  8. Line your tart tin or pan, trimming the excess off the edges, and pricking the bottom with a fork to prevent bubbling.
  9. The tart crust for this recipe should be “blind baked” for 10 to 15 minutes, keep your eye as oven heat can be fickle.
  10. After your par-baked tart crust has rested for a few minutes after the blind bake you may add the filling in an even layer and return to the oven for another 15 minutes, or until the custard has set.
  11. Once the tarty tart has completely cooled (patience is a chef’s best tool in the kitchen), you can add a thin layer of flugelberry jam, or any fruit preserve in your realm that is tart and colorful.
Delicious Tart with Fruit Preserve Topping

FINAL THOUGHTS

Well dear readers, it is quite a testament to your skill & patience in the kitchen if you have made it this far in my recipe book. There is a lot of work involved in creating a feast that will keep your head on your shoulders, but is well worth the effort.

As much as it pains me to admit, these recipes are not written in stone and you are free to use your Imagination & know-how to adjust these recipes to your realm and tastes.

And do remember dear readers, that with the right imagination any meal is one worth celebrating.

For Other Wonderland Recipes Visit Our Sweet Treat Edition

Meet The Author

Marco Arizpe

Marco Arizpe graduated from the University of Southern California and The American Film Institute with degrees in filmmaking and screenwriting. His brand of borderland gothic horror stems from his experiences growing up in a small town where Texas and Mexico meet. Culturally steeped in a rich history of all things terrifying, Marco never fails to bring forward indigenous folklore in contemporary and fresh settings.

The Royal Recipes of Wonderland: Sweet Treat Edition

Good day and good eating to you dear reader, it is I, Chef Rouxby, the royal chef de cuisine at the Heart Palace and your most competent author of this fine bit of cookery know-how. Having survived being a chef to the Heart Queens through several reigns, it seems only sensible to write down these delightful easy, Wonderland recipes while they are still in my head.

A TRIO OF TERRIFYING TREATS

Variety is the cinnamon-minnamon of life, and for a holiday as wonderfully dark as the Earth realm’s Halloween, I have deemed these three recipes worthy of passing on through the looking glass to you the reader.

While I understand that the common Earth “home chef” is not given a royal stipend for ingredients, equipment, and servants, the following recipes have been chosen for their relative ease and appeal to all.

I shall introduce you dear reader to some of the creative confections found in Wonderland that an Earth baker could whip up without slipping through the Continuum. Considering this is a holiday season where children can dress up, even as this “Alice in Wonderland” that supposedly exists there. Though I resent the idea that any of my goodies would shrink or grow Queen Alyss.

Beginning with the peculiarly named “Jabberwocky Eyes,” a simply delightful treat with a dreadful name. Then there is my no-bake Choco-Tarty Tart that are perfect for a last-minute request from Queen or Cat. And finally, we shall dive into the more complex world of sugar with an easy-to-follow recipe for Looking Glass Lollipops.

Now collect your utensils, gather your spirits, and prepare to enter a kitchen full of creativity!

JABBERWOCKY EYES

While I certainly cannot tell you what a real Jabberwocky eye might taste like—unlike the tribes of Boarderland would be able to—I can with all enthusiasm suggest that you try these delicious and easily prepared treats. Rest assured no Jabberwocky need be injured—but those with nut allergies need beware.

Chocolate and Peanut Butter Jabberwocky Eyes

Ingredients:

Chocolate and Peanut Butter Jabberwocky Eyes

Step-By-Step Instructions:

  1. Beat the peanut butter, unsalted butter, and vanilla together in a large bowl until light and fluffy. Then add in 4 cups of the sifted confectioners’ sugar and mix until dough is stiff, firm, and dry with no lumps (may the Queen have mercy on you if there are lumps). You may add more sugar as necessary to achieve a workable dough.
  2. Roll the dough into sixty 1-inch balls and place on wax paper lined cookie sheets, feel free to make the eyes as giant as the real thing but many might have trouble chewing such large “eye.”
  3. Then press a toothpick into the top of each ball for handling and chill in the freezer section of your chill-box-refrigerator contraption until firm, about 30 minutes.
  4. While the dough chills, place your choco-nibbles into a double boiler, made by placing a heat-safe bowl set over a pot of barely simmering water. Stir frequently until melted and smooth.
  5. Hold the toothpicks and dip frozen peanut butter balls into the melted chocolate, leaving a small “iris” of peanut butter showing at the top for the ghoulish effect. Return to the cookie sheet, remove and discard the toothpicks, and refrigerate until ready to serve.

NO-BAKE MINI CHOCOLATE TARTY-TARTS

This classic Wonderlandian treat elevates the humble Tarty-Tart without draining the clock. I can personally attest that this “no-bake” timesaver might help you keep your head if serving a Redd Queen with a black heart. (For transparency—I will add that several of my staff did lose their tongues during the reign of Her Imperial Viciousness, but I assure you this was for infractions made in the preparation of other dishes.)

No-Bake Mini Choco Tarty-Tarts

Ingredients:

Chocolate Tarty-Tart filling

Step-By-Step Instructions:

  1. Lightly grease 6 mini tart pans, or a large muffin/cupcake pan. Then, in a medium-sized bowl, combine the cookie crumbs and the melted coconut oil until thoroughly combined.
  2. Portion the mixture between the 6 mini tart pans and press into the bottom and sides to form and even crust. If using a muffin tin, portion appropriately but there may be leftovers.
  3. Cover and set in the freezer for 30 minutes to set.
  4. Place the chopped chocolate in a medium-sized bowl and set aside.
  5. Bring the cream to a simmer in a small saucepan over medium-high heat, be careful not to scald your dairy and stir occasionally. Once simmering, pour the cream over the chopped chocolate and let it sit for 2 minutes untouched.
  6. Gently whisk the cream and chocolate together until smooth. Add the butter in slices and continue slowly stirring until melted and combined with the chocolate mixture.
  7. Pour the chocolate mixture into the chilled tart shells, and use an offset spatula to spread the chocolate into an even layer. Place in your “fridge” to chill for a minimum of 2 hours, and up to 2 days.
  8. Serve with fresh flugelberries (or similar substitutes—perhaps a “Razz-berry” as I’ve heard they are quite agreeable even to those of us with finer palates), powdered sugar, or whipped cream.

LOOKING GLASS LOLLIPOPS

Here is where things could get messy, and I would not consider it an offense should you skip this recipe until you feel as confident as Queen Crumpet in the kitchen. Sugar can be dangerous, be warned my dear readers!

Though Looking Glass Lollipops cannot mimic the true magic of a mirror—they can indeed generate a sense of whimsy in your kitchen. Though you didn’t hear it from me, Jack of Diamonds can credit at least some of his well-endowed posterior to a deep love of these sweetly colourful treats, even if the writer Lewis Carroll forgets them in his rendition of Tea Time!

Looking Glass Lollipops, Credit to Confetti & Bliss

Ingredients:

House of Hearts Lollipop
House of Hearts Lollipops

Step-By-Step Instructions:

It’s important to have everything set out and ready to go before you begin this recipe. As without a cook’s crystal to monitor things, once the hard-candy mixture reaches the hard crack stage, you have to act quickly to form and decorate the lollipops before they harden. Read and heed the instructions below for good success.

  1. Create an ice-water bath for the pot you will be making your sugar mixture. You can use the small portion of your kitchen sink or a heat-resistant bowl filled with ice cubes and water. You will also need a heat-resistant glass measuring cup with a pouring spout. Set out your measuring spoons and desired flavoring. Pull out two or three large baking trays and line them with silicone baking mats or parchment paper.
  2. Place your lollipop sticks right next to the silicone mats or parchment paper, take the lids off your gel food coloring so they’re ready to use, and set out several toothpicks as you’ll need a separate one for each color. You can also use the spare lollipop sticks for making the swirls.
  3. Begin by adding three cups of granulated sugar to your clean dry pot. Add in the cold water using this important royal technique: slowly rotate the pot 360 degrees as you pour the water tightly along the interior wall of the pot. This is to ensure that no sugar granules stick to the inside walls of the pot where they will harden and crystalize, but not nearly as useful as the ones in Wonderland. When making lollipops you want a nice clear syrup.
  4. Pour the light corn syrup in the center of the pot, allowing it to spread to the edges and meet the water. Let these three ingredients sit in the pot for 12-15 minutes so the liquids can completely soak down into the sugar. With a clean finger, briefly stir the ingredients to make sure everything is well combined.
  5. The hard-crack stage for making lollipops is 305 F. Place the pot over medium heat. DO NOT STIR the sugar mixture as it cooks. The mixture will gradually start to boil. As the liquid evaporates the bubbling will get pretty lively, do not worry dear readers. Use a candy thermometer to track the temperature of the mixture. Once it reaches 305 F, it’s at the perfect “hard crack stage” that’s needed for making lollipops.
  6. The very moment the candy thermometer displays 305 F, remove the pan from heat. Immediately add in the flavoring and swirl the pot back and forth to mix it in. Right away stick the pot in the ice-water bath for 15-18 seconds to stop the temperature of the sugar mixture from rising.
  7. If the temperature rises above the “hard crack stage” it will turn yellow or amber color and will start to caramelize. We want our lollipops to be stained glass clear so we can add in those beautiful colorful swirls.
  8. Remove the hot pan from the ice bath, taking care not to get any water inside the pan. Immediately pour the sugar mixture into an oven-safe glass measuring cup.
  9. To form the lollipops, CAREFULLY pour the scalding hot liquid sugar directly onto your silicone mats or parchment paper. I suggest pouring only two lollipops at a time because they harden up fast! These are free-form candies so you don’t need molds for this recipe.
  10. Immediately place a few drops of gel food coloring onto the first lollipop and use toothpicks or spare lollipop sticks to quickly swirl around the food coloring in a colorful design.
  11. Quickly place the lollipop stick into the lollipop about halfway up and rotate the stick 360 degrees. Place another dollop or two of hot syrup over the embedded lollipop stick just to give it some added stability.
  12. Once cool, remove and enjoy! Wrap in wax paper, if you will be serving to little lords and ladies from noble houses. (An ambitious chef might shape their lollipops into the royal symbols of Hearts, Spades, Clubs, and Diamonds for added effect.)
Looking Glass Lollipops ready for Halloween

Dearest readers I do hope you have found these recipes stimulating to your appetite and add your own inventive twists to these tasty treats. The wonderous world of flavor is out there for you to explore and share with those who still have tongues to appreciate such things.

Never forget that Imagination is the finest spice, and the essence of all things good. Imbue your cooking with the all the light (or dark) creativity you possess and never fear a failed experiment.

Now I simply MUST get back to the rest of this cook-book before my own saucy opinions get me in trouble.

Meet the Author

Marco Arizpe

Marco Arizpe graduated from the University of Southern California and The American Film Institute with degrees in filmmaking and screenwriting. His brand of borderland gothic horror stems from his experiences growing up in a small town where Texas and Mexico meet. Culturally steeped in a rich history of all things terrifying, Marco never fails to bring forward indigenous folklore in contemporary and fresh settings.